Categories
Linux

Setting up Prometheus on Ubuntu 18.04 LTS

I recently set out to get Prometheus setup, capturing metrics across ‘traditional’ VM (Ubuntu 18.04) and containerised workloads whilst enabling visibility of captured metrics in Grafana. The steps captured below outlines the approach/ configuration I used to get Prometheus, Node-Exporter and cAdvsor up and running. I’ll follow-up with the Grafan Integration/ Configuration in a separate post.

Note this guide assumes you have Docker CE running on the machine you intend to deploy and run Prometheus.

First, create the required user accounts:

sudo useradd -rs /bin/false prometheus
sudo useradd -rs /bin/false node_exporter

Make a note of the ‘prometheus’ account user and group id’s from /etc/passwd, you’ll need these later:

cat /etc/passwd | grep prometheus

Create the required directory structure, in order to ensure configuration and metric data persists container redeployment:

mkdir -p ~/prometheus/config
mkdir -p ~/prometheus/data

Create Prometheus configuration file:

sudo vi ~/prometheus/config/prometheus.yml

Contents (note that ‘localhost’ is used for targets):

# A scrape configuration scraping a Node Exporter and the Prometheus server
# itself.
global:
  scrape_interval:     15s # By default, scrape targets every 15 seconds.

scrape_configs:
  # Scrape Prometheus itself every 5 seconds.
  - job_name: 'prometheus'
    scrape_interval: 5s
    static_configs:
      - targets: 
        - 'localhost:9090'

  - job_name: 'node'
    scrape_interval: 5s
    static_configs:
      - targets:
        - 'localhost:9100'

  - job_name: 'cadvisor'
    scrape_interval: 5s
    static_configs:
      - targets:
        - 'localhost:9080'

Set required filesystem permissions:

sudo chown -R prometheus:prometheus ~/prometheus/

Create docker-compose.yaml:

vi ~/prometheus/docker-compose.yaml

Contents as below, remember to set the correct user id and group id for the ‘prometheus’ user , as captured earlier:

version: '3.2'
services:

  prometheus:
    user: 999:998
    image: prom/prometheus:latest
    container_name: prometheus
    logging:
      options:
        max-size: "10m"
        max-file: "5"
    restart: unless-stopped
    ports:
    - 9090:9090
    command:
    - --config.file=/etc/prometheus/prometheus.yml
    - --storage.tsdb.path="/data/prometheus" 
    volumes:
    - ./config/prometheus.yml:/etc/prometheus/prometheus.yml:ro
    - ./data:/data/prometheus:rw
    depends_on:
    - cadvisor

  cadvisor:
    image: google/cadvisor:latest
    container_name: cadvisor
    logging:
      options:
        max-size: "10m"
        max-file: "5"
    restart: unless-stopped
    ports:
    - 8080:8080
    volumes:
    - /:/rootfs:ro
    - /var/run:/var/run:rw
    - /sys:/sys:ro
    - /var/lib/docker/:/var/lib/docker:ro
    depends_on:
    - redis

  redis:
    image: redis:latest
    container_name: redis
    logging:
      options:
        max-size: "10m"
        max-file: "5"
    restart: unless-stopped
    ports:
    - 6379:6379

I ran into issues with the containerised version of node-exporter, where instances in Grafana would persistently show ‘N/A’ or no-data, despite metrics being captured as expected in Prometheus itself.

Moving to a ‘natively’ installed node-exporter fixed these issues.

Download and extract the latest version of node-exporter, this is an X66_64 example:

cd ~

wget https://github.com/prometheus/node_exporter/releases/download/v1.0.0/node_exporter-1.0.0.linux-amd64.tar.gz

tar -xvf node_exporter-1.0.0.linux-amd64.tar.gz
cd node_exporter-1.0.0.linux-amd64

Copy the node-exporter binary to /usr/sbin:

sudo mv node_exporter /usr/sbin/

Create systemd service:

sudo touch /etc/systemd/system/node_exporter.service

sudo tee -a /etc/systemd/system/node_exporter.service > /dev/null <<EOT
Description=Node Exporter

[Service]
User=node_exporter
EnvironmentFile=/etc/sysconfig/node_exporter
ExecStart=/usr/sbin/node_exporter $OPTIONS

[Install]
WantedBy=multi-user.target
EOT

sudo mkdir -p /etc/sysconfig
sudo touch /etc/sysconfig/node_exporter

sudo tee -a /etc/sysconfig/node_exporter > /dev/null <<EOT
OPTIONS="--collector.textfile.directory /var/lib/node_exporter/textfile_collector"
EOT

Create required folder structure for node-exporter, note the use of the ‘node_exporter’ account we created earlier:

sudo mkdir -p /var/lib/node_exporter/textfile_collector
sudo chown node_exporter:node_exporter /var/lib/node_exporter/textfile_collector

Reload systemd daemons and start node-exporter:

sudo systemctl daemon-reload

sudo systemctl enable node_exporter
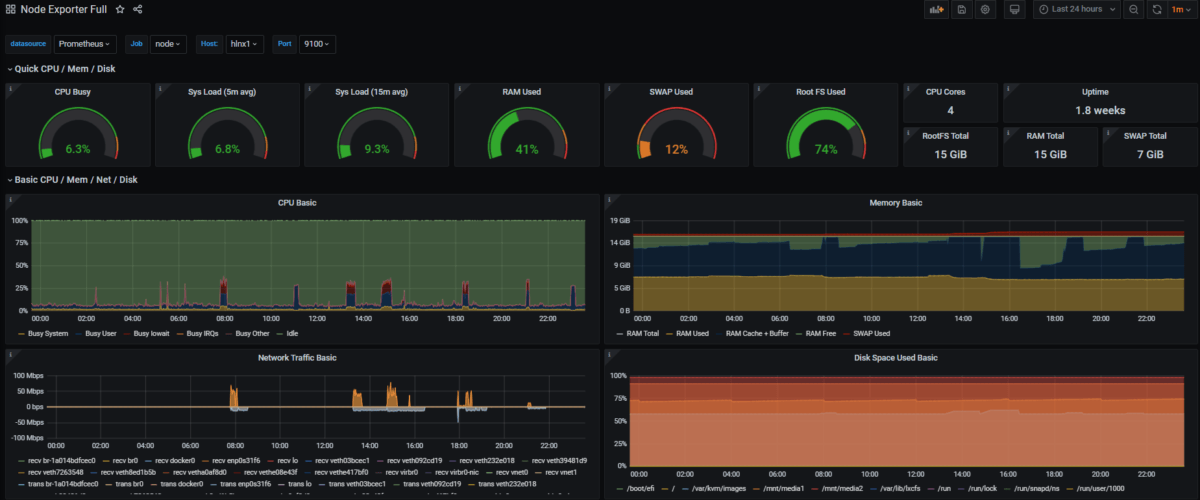
sudo systemctl start node_exporter

You should now be able to view node-exporter metrics via: https://localhost:9100

Now, we can start Prometheus and cAdvisor, as defined in our Docker Compose file:

cd ~/prometheus
sudo docker-compose up -d

You should now be able to browse Promethus itself via: http://localhost:9090

Browse to http://localhost:9090/targets and ensure that cAdvisor, Node and Prometheus show as ‘1/1 up’ – assuming that they do, you have a working Promethus installation.

Adding new nodes to Node-Exporter is as simple as deploying Node-Exporter as above, on each required ‘target’ or node you wise to monitor, then editing the prometheus.yml file to include the new ‘target’ – for example:

...

  - job_name: 'node'
    scrape_interval: 5s
    static_configs:
      - targets:
        - 'localhost:9100'
        - 'newserver:9100'

...

Add additional targets to the ‘node’ job (rather than creating new jobs for each host) as this will make viewing the data in Grafana easier.

Once you have updated and saved the configuration file, restart Prometheus:

cd ~/prometheus
sudo docker-compose restart

Categories
Linux

Creating a new Raspberry Pi/ Raspbian User with GPIO Access

Creating a new user in Raspbian, or any Linux distribution, is simple, just use the commands below:

sudo adduser <username>
sudo adduser <username> gpio

If you fail to add the user to the “gpio” group you will get the following Python error when trying to perform GPIO-related tasks:

No access to /dev/mem. Try running as root!

If you want the user to be a “Super User” i.e. have access to run commands with root privileges via sudo (see here for more info), add the user to the “sudo” group as well:

sudo adduser <username> sudo
Categories
Linux

Content Filtering for Kid-safe Internet at Home via Pi-Hole and OpenDNS

Its worth noting that Pi-Hole can be deployed on an x86 or ARMHF (Raspberry Pi) Linux platform (i.e. no Windows deployments). That said, any device/ client type can *use* the service once deployed/ configured as outlined below.

If like me, you have young kids you’ll want to try and protect them from inappropriate content online. This is no easy feat, and there is no ‘silver bullet.’

I was already using OpenDNS Family Shield to provide DNS-based filtering via my Internet router (functionality integrated into modern ASUS routers, but you can manually set your DNS servers as outlined here) but this wasn’t sufficient when reviewing search engine results, especially image search results.

I started looking at web content filters such as Privoxy, SquidGaurd, E2Guardian etc. but when it came to HTTPS/ SSL filtering these all suffer from very limited capabilities or were complex to setup/ configure (requirement for custom CA certificates on devices for starters). As more and more of the Internet goes SSL-only this meant that using one of these options was, potentially, a “depreciating” solution.

I needed to find an effective way to filter content presented by search engines whilst maintaining the excellent block-list functionality that OpenDNS Family Shield provides.  Further reading led me to discover that popular search engines/ YouTub provide Safe Search/ Restricted Search-only URLs that have to be set/ configured using DNS CNAMEs – some links that will explain this in more detail (you can skip these if you are looking to configure this capability within PiHole):

Sadly, despite being requested multiple times, OpenDNS Family shield does not provide this functionality – interestingly this seems like a fairly simple capability to offer considering that DNS itself is the mechanism to force Safe Search. Enter Pi-Hole and dnsmasq.

PiHole is not a web content filter, it is an Ad blocker.

However, you can use the built-in dnsmasq service to force Safe Search URLs against popular search engines/ YouTube and continue to leverage DNS-based filtering such as OpenDNS Family shield. The two combined seem to provide a comfortable level of protection for my home network.

This guide assumes you have Docker installed/ running on Linux, this guide was tested on Ubuntu 17.10.

Docker Containers are immutable – i.e. if you delete the container its contents (including your configuration/ customisation) will be lost. We can use Docker volumes/ mount functionality to persist some data.

sudo mkdir /var/kvm/images/docker/pihole
sudo mkdir /var/kvm/images/docker/pihole/dnsmasq.d

Now create required dnsmasq configuration to force Safe Search (note most guides I found on this neglect to mention requirement to add regional Google URL, in the UK when browsing to www.google.com you redirect to www.google.co.uk):

sudo vi /var/kvm/images/docker/pihole/dnsmasq.d/05-restrict.conf

# YouTube Restricted
cname=www.youtube.com,restrict.youtube.com
cname=m.youtube.com,restrict.youtube.com
cname=youtubei.googleapis.com,restrict.youtube.com
cname=youtube.googleapis.com,restrict.youtube.com
cname=www.youtube-nocookie.com,restrict.youtube.com

# Google SafeSearch
cname=www.google.com,forcesafesearch.google.com
cname=www.google.co.uk,forcesafesearch.google.com

# Bing Family Filter
cname=www.bing.com,strict.bing.com

# DuckDuckGo
cname=www.duckduckgo.com,safe.duckduckgo.com
cname=duckduckgo.com,safe.duckduckgo.com

Now create the Docker Container, be sure to change your upstream DNS servers set using the DNS1/ DNS2 arguments and change WEBPASSWORD value. Also, note the host-file entries that are passed through to the Docker Container using the “–add-host” Docker run argument.

You can also set DNS1/ DNS2 to be the OpenDNS servers, as outlined here.

Finally, on Ubuntu I had to specify the LAN IP address of the Docker host for tcp/ udp port 53 port exposure. This is because Docker has a built-in DNS resolver. Be sure to change the script/ replace 192.168.0.7 with your Docker host IP address.

IP_LOOKUP="$(ip route get 8.8.8.8 | awk '{ print $NF; exit }')" # May not work for VPN / tun0
IPv6_LOOKUP="$(ip -6 route get 2001:4860:4860::8888 | awk '{ print $10; exit }')" # May not work for VPN / tun0
IP="${IP:-$IP_LOOKUP}" # use $IP, if set, otherwise IP_LOOKUP
IPv6="${IPv6:-$IPv6_LOOKUP}" # use $IPv6, if set, otherwise IP_LOOKUP

sudo docker run -d \
--name pihole \
-p 192.168.0.7:53:53/tcp -p 192.168.0.7:53:53/udp -p 8081:80 \
-v /var/kvm/images/docker/pihole/:/etc/pihole/ \
-v /var/kvm/images/docker/pihole/dnsmasq.d/:/etc/dnsmasq.d/ \
-e ServerIP="${IP}" \
-e ServerIPv6="${IPv6}" \
-e WEBPASSWORD={your password} \
-e DNS1=192.168.0.254 \
-e DNS2=192.168.0.254 \
--add-host=restrict.youtube.com:216.239.38.120 \
--add-host=restrictmoderate.youtube.com:216.239.38.119 \
--add-host=forcesafesearch.google.com:216.239.38.120 \
--add-host=strict.bing.com:204.79.197.220 \
--add-host=safe.duckduckgo.com:34.243.144.154 \
--restart=unless-stopped \
diginc/pi-hole:latest

You can now browse to http://<Docker Host IP>:8081, this should bring up the Pi-Hole Web Interface.

Finally, you’ll need to modify the DHCP configuration for your network to ensure that clients are provided with the IP address of the Docker host running Pi-Hole as their DNS server. I’ll state that you don’t *need* to use Pi-Hole to force Safe Search, any local DNS service that you can configure CNAME/ A-Records to override default IPs returned for Search Engines outlined in this post will do. You can then set the upstream DNS server(s) to be Open DNS Family Shield, or anything else. Pi-Hole provides the added benefit of Ad blocking, and my kids love clicking on Ads…

Categories
Linux

Getting Analogue Sound Working on Raspberry Pi 3B+ / Raspbian Stretch

I’ve been testing the Raspberry Pi 3B+ with Raspbian Stretch recently. I have a few older Raspberry Pi 3 devices around the house, but these are all running RasPlex and connected via HDMI to a TV – these devices have always worked perfectly (and impressively  well considering their cost) when playing high bit-rate 1080p video with lossless HD surround sound.

The same cannot be said for getting analogue audio working in Raspbian O/S- to say this has been a “journey of discovery” for something so simple would be an understatement. Out of the box I could not get Chromium, omxplayer or any applications to play sound via the Analogue audio jack.

Nevertheless, with some “tweaking” I now have analogue audio working across  Chromium, omxplayer and other applications. Instructions follow…

First we will set configuration in /boot/config.txt

# Force HDMI to operate in DVI mode
hdmi_drive=1
# Pretends all audio formats are *unsupported* by HDMI display, i.e. use analogue jack
hdmi_ignore_edid_audio=1
hdmi_force_edid_audio=0
# Force use of newer audio driver for RPi, not sure actually needed on stretch/ 3B+
audio_pwm_mode=2

With the above in-place, following a reboot, I had sound in omxplayer, but Chromium and other applications continued to be silent.

The final piece of the puzzle was to use the command below to set output to the Analogue jack:

# Force audio through analogue jack, needed for audio_pwm_mode=2 driver
amixer -c 0 cset numid=3 1

Next challenge, hardware acceleration for video in Chromium itself… this looks like a mess on Linux at the moment, so I am unlikely to sort this with a few config file changes!

Categories
Linux

Improving Raspberry Pi 3B+ Chromium Performance

I recently added a Raspberry Pi3B+ to my ever-increasing Raspberry Pi devices . I have a few of the Model 3’s running as RasPlex clients throughout the house. This new Pi was destined for a different purpose – trying to get the kids into coding!

I downloaded and deployed the March 2018 Raspbian OS, deployed it to an 8GB micro-SD card and fired the device up. I very, very quickly ran into performance issues when using Chromium, to the point of it crashing the Pi, and needing to pull the power to hard reset.

I’ve since dramatically improved this situation by extending the swap size, as below. Note that this solution will likely cause increased wear/ performance degradation over time on the SD card – at £6.00 for a 16GB card I am not too concerned.

# Modify the swap config
sudo vi /etc/dphys-swapfile

# Change the CONF_SWAPSIZE value to 1024, or greater if you have a larger SD card/ sufficnet space.
CONF_SWAPSIZE=1024

# Now save your changes and reboot the Pi
sudo reboot

Whilst not perfect, this has made the Pi 3B+ acceptable when using Chromium and multiple tabs.

Categories
Linux

Deploying Guacamole (and Duo MFA) via Docker Containers on Ubuntu

This guide replaces any previous guacamole docker deployment guides on cb-net and will be kept up-to-date as new releases emerge.

Updated: 22/01/18 : New Guacamole release 0.9.14

Use this guide to deploy a fresh/ new install of guacamole on Ubuntu using Docker containers, instructions include Docker CE installation, Duo MFA configuration (if wanted, can be skipped) and Guacamole/ pre-requisite container deployment to get you up and running. Scenarios:

  • No Docker, and want to use Duo MFA: follows sections one, two and three
  • No Docker, but don’t want to use Duo MFA: follow section one and three only
  • Already have Docker and want to use MFA: follow sections two and three only
  • Already have Docker and don’t want to use MFA: follow section three only
Categories
Linux

Creating a Windows Server 2012 R2 KVM/ QEMU Guest

You’ll need to obtain the latest virtio-win-<version>.iso file and copy this to you host, alongside the Windows Server 2012 R2 ISO. Get the former from here: https://fedorapeople.org/groups/virt/virtio-win/direct-downloads/archive-virtio/

Both of these ISO’s will be mounted on the guest as you’ll have to manually load the virtstor drivers during Windows setup.

Use the code below to create the guest machine, this assumes you have copied ISO images to /var/kvm/images/iso:

sudo virt-install \
--name vwinguest1 \
--ram 2048 \
--disk path=/var/kvm/images/vm/vwinguest1.qcow2,size=16,bus=virtio,format=qcow2 \
--disk /var/kvm/images/iso/win2012r2.ISO,device=cdrom,bus=ide \
--disk /var/kvm/images/iso/virtio-win.iso,device=cdrom,bus=ide \
--vcpus 1 \
--os-type windows \
--os-variant win2k12r2 \
--network bridge=br0,model=virtio \
--graphics vnc,listen=0.0.0.0 \
--noautoconsole \
--accelerate \
--console pty,target_type=serial

Now open KVM and connect to the host IP on port 5901 (or the next free VNC port if you have other guests running with VNC graphics on this host).

Use the code below to auto-start the VMs on host start-up:

sudo virsh autostart vwindc1
Categories
Linux

How to make a Linux systemd service wait for a VPN interface before starting

Like me, you may have a requirement for a service to start only once a VPN interface is established.

This is quite easy to achieve by extending the systemd unit file for the service in question. In this example, based upon Ubunutu 16.04 but portable to other systemd-based distros, I will focus on docker.service, but the configuration is applicable to any service – provided you change the relevant folder/ filenames, in bold, appropriately.

For a service other than docker.service, find and replace “docker.service” with the relevant service name you want to wait for VPN connectivity.

You also need to identify the systemctl device id for you VPN connection.

# Identify the VPN interface name - commonly "tun0"
ifconfig

# Find the systemctl interface name based upon output from command above. In my case this output "sys-devices-virtual-net-tun0.device"
systemctl | grep tun0

With the systemctl device name, and having replaced docker.service if required proceed.

sudo mkdir /etc/systemd/system/docker.service.d/
sudo touch /etc/systemd/system/docker.service.d/depend.conf
sudo vi /etc/systemd/system/docker.service.d/depend.conf

# New conf file should only contain lines below
[Unit]
Requires=sys-devices-virtual-net-tun0.device
After=sys-devices-virtual-net-tun0.device

# Now save the file and exit vim

# Reload systemd daemons
sudo systemctl daemon-reload

# Test container connectivity following a reboot
Categories
Linux

Upgrading a Docker-based, Duo MFA enabled deployment of Guacamole 0.9.11-incubating to 0.9.12-incubating

For a fresh, Duo MFA-enabled installation of Guacamole, follow instructions outlined here: https://www.cb-net.co.uk/linux/deploying-guacamole-duo-mfa-via-docker-containers-ubuntu/

To get guacamole deployed using docker containers, on Ubuntu 16.04, see my other post here: https://www.cb-net.co.uk/linux/enabling-duo-dual-multi-factor-authentication-mfa-for-guacamole-docker/

In this post I cover how to update your duo MFA-enabled, docker-based guacamole 0.9.11-incubating deployment to 0.9.12-incubating.

This guide assumes you have a working 0.9.11-incubating deployment, comprised of:

  • A guacd container named guacd
  • A guacamole/guacamole container names guacamole
  • A mysql container named guac-mysql
  • A pass-through volume that contains duo MFA extension and guacamole.properties file on the docker host in the following location: /var/docker/config/guacamole/

Finally, upgrading 0.9.11-incubating to 0.9.12-incubating does not require a database update, so this is not included below.

# Stop and remove the previous guacd/ guacamole instances
sudo docker stop guacamole
sudo docker stop guacd
sudo docker rm guacd
sudo docker rm guacamole

# Pull latest container images for guacd/ guacamole
sudo docker pull guacamole/guacd
sudo docker pull guacamole/guacamole

# Pull latest duo MFA extension
cd /var/docker/config/guacamole/extensions/
wget http://apache.mirrors.tds.net/incubator/guacamole/0.9.12-incubating/binary/guacamole-auth-duo-0.9.12-incubating.tar.gz
tar zxvf guacamole-auth-duo-0.9.12-incubating.tar.gz
mv guacamole-auth-duo-0.9.12-incubating/guacamole-auth-duo-0.9.12-incubating.jar /var/docker/config/guacamole/extensions/

# Ensure you clean-up older versions!

# Create/ start the new guacd/ guacamole containers
sudo docker run --name guacd -d guacamole/guacd

sudo docker run --name guacamole --link guacd:guacd --link guac-mysql:mysql \
-e MYSQL_DATABASE='guacamole' \
-e MYSQL_USER='guacamole' \
-v /var/docker/config/guacamole:/config \
-e GUACAMOLE_HOME=/config \
-e MYSQL_PASSWORD='<your password>' \
-d -p 8080:8080 guacamole/guacamole

# Set to auto-start on docker restart
sudo docker update --restart=always guacd
sudo docker update --restart=always guacamole
Categories
Linux

Using Let’s Encrypt with an NGINX Docker Container (plus bye-bye StartSSL!)

Updated June 2017 : reflecting move to certbot/certbot container.

I ran into an issue this week with my StartSSL certificates deployed on my personal lab/ infrastructure. It turns out the Google stopped trusting this CA with a recent release of Chrome, and that this had been on the cards for a while: https://security.googleblog.com/2016/10/distrusting-wosign-and-startcom.html

So, with this in mind, I decided to make the move to Let’s Encrypt.

My Environment

  • Ubuntu Server 16.04
  • Docker containers for:
    • Nginx (used as a reverse proxy) configured to redirect all HTTP traffic to HTTPS
    • A test website published at: test.cb-net.co.uk
    • A Guacamole instance, published at: remote.cb-net.co.uk

The fact that I was using docker containers would make this little more “interesting” or challenging.


Using Let’s Encrypt Certificates in a Docker Container

I came across the following post which I used as a foundation for the method below: https://manas.tech/blog/2016/01/25/letsencrypt-certificate-auto-renewal-in-docker-powered-nginx-reverse-proxy.html

Much is common in terms of the solution/ scripts.


NGINX Container/ Config

NGINX volumes passed-through to container from the docker host (you’ll use these later):

  • Config folder: /var/docker/volumes/nginx/conf.d
  • SSL certificate root:/var/docker/volumes/nginx/ssl
  • WWW root folder: /var/docker/volumes/nginx/www/ : Create a folder per domain – i.e.
    • /var/docker/volumes/nginx/www/test.cb-net.co.uk
    • /var/docker/volumes/nginx/www/remote.cb-net.co.uk

Create the directory structure on your docker host above (change domains to match your needs):

sudo mkdir -p /var/docker/volumes/nginx/conf.d
sudo mkdir -p /var/docker/volumes/nginx/www/test.cb-net.co.uk
sudo mkdir -p /var/docker/volumes/nginx/www/remote.cb-net.co.uk
sudo mkdir -p /var/docker/volumes/nginx/ssl

Now, re-create the NGINX container to include the config, root and the SSL folders:

sudo docker pull nginx
sudo docker run --name nginx -p 80:80 -p 443:443 \
-v /var/docker/volumes/nginx/ssl/:/etc/nginx/ssl/ \
-v /var/docker/volumes/nginx/conf.d/:/etc/nginx/conf.d/ \
-v /var/docker/volumes/nginx/www/:/var/www \
-d nginx

Modifying your HTTP to HTTPS Redirect Config

Skip this section if you have a new NGINX container/ no SSL in-place today.

Leaving a redirect all to HTTPS configuration in place will cause the Let’s Encrypt certificate request to fail (specifically the domain validation piece).

You need to modify the NGINX configuration to create a root folder, per domain, that Let’s Encrypt will use for domain validation. All other traffic will be redirected to HTTPS.

You’ll need to do this for each published site/ resource.

# Redirect http to https
 server {

 listen 80;
 server_name test.cb-net.co.uk;

#### Required for letsencrypt domain validation to work
 location /.well-known/ {
 root /var/www/test.cb-net.co.uk/;
 }

return 301 https://$server_name$request_uri;
 }

Ensure you allow port 80 traffic to hit your web server for the request to work.


Requesting the Certificate

We’ll use a docker image for this piece as well.

You can see below, I specify the SSL folder we created and mapped into the NGINX container:

  • /var/docker/volumes/nginx/ssl

Be sure to change the domain name, web root path and email address used in the request.

# Pull the docker image
sudo docker pull certbot/certbot

# Request the certificates - note one per published site
sudo docker run -it --rm --name letsencrypt \
 -v "/var/docker/volumes/nginx/ssl:/etc/letsencrypt" \
 --volumes-from nginx \
 certbot/certbot \
 certonly \
 --webroot \
 --webroot-path /var/www/test.cb-net.co.uk \
 --agree-tos \
 --renew-by-default \
 -d test.cb-net.co.uk \
 -m [email protected]

sudo docker run -it --rm --name letsencrypt \
 -v "/var/docker/volumes/nginx/ssl:/etc/letsencrypt" \
 --volumes-from nginx \
 certbot/certbot \
 certonly \
 --webroot \
 --webroot-path /var/www/remote.cb-net.co.uk \
 --agree-tos \
 --renew-by-default \
 -d remote.cb-net.co.uk \
 -m [email protected]

If successful, the new certificate files will be saved to: /var/docker/volumes/nginx/ssl/live/<domain name>

You will find four files in each domain folder:

  • cert.pem: Your domain’s certificate
  • chain.pem: The Let’s Encrypt chain certificate
  • fullchain.pem: cert.pem and chain.pem combined
  • privkey.pem: Your certificate’s private key

Pulling it all Together

We now need to configure NGINX to use these certificates, modify your config file as below, adding a new location to both HTTP and HTTPS listeners – these lines will need to be set for each published resource/ certificate as requested above, within the relevant server definition in your NGINX configuration file.

I have only included a single server definition in the config file example below, you can simply copy/ paste to create additional published resources/ modify as necessary.

# Redirect http to https
 server {
 listen 80;
 server_name remote.cb-net.co.uk;

#### Required for letsencrypt domain validation to work
 location /.well-known/ {
 root /var/www/remote.cb-net.co.uk/;
 }

return 301 https://$server_name$request_uri;
 }

# Guacamole Reverse Proxy HTTPS Server
server {
listen 443 ssl;
server_name remote.cb-net.co.uk;
rewrite_log on;

ssl_certificate /etc/nginx/ssl/live/remote.cb-net.co.uk/fullchain.pem;

ssl_certificate_key /etc/nginx/ssl/live/remote.cb-net.co.uk/privkey.pem;

ssl_trusted_certificate /etc/nginx/ssl/live/remote.cb-net.co.uk/fullchain.pem;

#### Required for letsencrypt domain validation to work
 location /.well-known/ {
 root /var/www/remote.cb-net.co.uk/;
 }
# Only needed for guacamole
location / {
 proxy_pass http://<guacamole instance>:8080/guacamole/;
 proxy_redirect off;
 proxy_buffering off;
 proxy_set_header X-Real-IP $remote_addr;
 proxy_set_header X-Forwarded-For $proxy_add_x_forwarded_for;
 proxy_set_header Upgrade $http_upgrade;
 proxy_set_header Connection $http_connection;
 proxy_cookie_path /guacamole/ /;
 access_log off;
 }
}

# Create additional server blocks for other published websites.

Once modified/ saved, restart the nginx instance:

sudo docker restart nginx

Automating the Renewal

These certificates will only last 90 days, so automating renewal is key!

Create the script below as /etc/cron.monthly/letsencrypt-renew.sh

#!/bin/sh

# Pull the latest version of the docker image
 docker pull quay.io/letsencrypt/letsencrypt

# Change domain name to meet your requirement
docker run -it --rm --name letsencrypt \
 -v "/var/docker/volumes/nginx/ssl:/etc/letsencrypt" \
 --volumes-from nginx \
 certbot/certbot \
 certonly \
 --webroot \
 --webroot-path /var/www/test.cb-net.co.uk \
 --agree-tos \
 --renew-by-default \
 -d test.cb-net.co.uk \
 -m [email protected]

# Change domain name to meet your requirement
docker run -it --rm --name letsencrypt \
 -v "/var/docker/volumes/nginx/ssl:/etc/letsencrypt" \
 --volumes-from nginx \
 certbot/certbot \
 certonly \
 --webroot \
 --webroot-path /var/www/remote.cb-net.co.uk \
 --agree-tos \
 --renew-by-default \
 -d remote.cb-net.co.uk \
 -m [email protected]

# Chnage "nginx" to the nginx container instance
docker kill --signal=HUP nginx

Now enable execute permissions on the script:

chmod + x /etc/cron.monthly/letsencrypt-renew.sh

Finally, you can test the script:

./etc/cron.monthly/letsencrypt-renew.sh

Once executed, your published sites should reflect a certificate with a created time stamp of just a few seconds after running the script.