With NetScaler VPX 10 now released I thought I’d upgrade the HA pair I’ve configured for the recent articles on the site.
Needless to say the pocess is fairly quick and fairly simple, click the jump to read more.
4.1 Standalone / Secondary HA Node
6. Access Gateway – Receiver Theme
1. Supported Upgrade Paths
It is possible to upgrade form version 8.0, 8.1, 9.0, 9.1, 9.2, or 9.3 to versoin 10. Upgrades from thes versions do not require a new license.
Just an idea, power off your NetScaler VPX devices and snapshot them prior to performing the upgrade – that way if the ‘wheels fall off’ so to speak you have a good roll back plan. Sorry – this won’t work should you be using the Hardware NetScaler devices that are available.
2. HA Considerations
In a NetScaler HA Pair you should upgrade the Secondary NetSCaler FIRST, then upgrade the Primary. You can chose to force a failoverover once the secondary node upgrade is complete – remember this will reset connections to the NetScaler HA pair.
3. Pre-requisites
Download the following files from My Citrix: build-10.0-54.7_nc.tgz (NetScaler ADC > Firmware > Get Firmware) ns-10.0-54.7-doc.tgz (NetScaler ADC > Firmware > Show Documentation and then click Get Documentation)
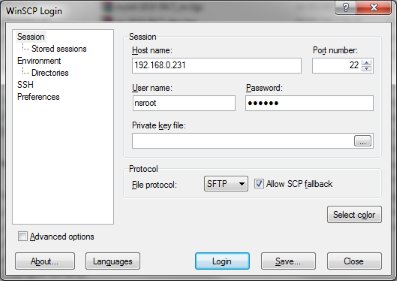
Logon to the NetScaler using WinSCP:

Create a 10nsinstall subdirectory in the /var/nsinstall directory. Change directory to /var/nsinstall/10nsinstall, create a directory named build_547, and change to this directory.


Finally copy the upgrade files to the NetScaler using WinSCP;

4. Perform the Upgrade
4.1 Standalone / Secondary HA Node
Logon to the console and enter the following commands:
-
- save config
![]()
-
- shell
- cp /nsconfig/ns.conf /nsconfig/ns.conf-523

Download this file using WinSCP for safe keeping!
Extract the downloaded firmware:
-
- cd /var/nsinstall/10nsinstall/build_547
- tar zxvf build-10.0-54.7_nc.tgz
- tar zxvf ns-10.0-54.7-doc.tgz

Execute the installns script: ./installns

Once the NetScaler VPX upgrade has completed you’ll be prompted to restart the device.

Once the reboot has rebooted (this will take a few minutes!) you can logon to the web interface and verify the configuration.
Note, if you are running a standalone NetSCaler VPX then you’re done for section 4.

If running HA you should be prompted about the fact you are logged onto the secondary node:

From the console you can verify the Sync / Propogation is disabled using the command “show ha node” – this is normal as the versions don’t match between the devices:

If running HA, you have the option here of performing a force failover using the command “forcefailover” form the Secondary NetScaler console – bear in mind if you do this sessions are not being sync’d between the NetScaler devices – i.e. you will lose your session tables and users will have to reconnect/authenticate, so plan to do this at a convienient time!

If you perform the failover then test as per section 5, if not then perform the upgrade of the Primary Node in section 4.2, then perform your testing.
4.2 Primary HA Node
Perform the upgrade as above on the Primary device (which, if you forcefailover, is now secondary)
Once complete verify the sync/propagation is working.
5. Testing
If using ha, run the command “show ha node” from the console to verify the Sync and Propagation are working:

Finally test your applictaions you serve up through your NetScalers:


6. Access Gateway – Receiver Theme
If you are using the Access Gateway feature then take a look at the article below, this will advise on how to install the new Storefront/Receiver theme onto Access Gateway – looks MUCH better!
