Deploying the Virtual Machine
First you’ll need to convert the OVF available for ESX using the OVF tool available here. Once installed, extract the NetScaler archiveand run the following command – changing the paths appropriately:
{code lang:css showtitle:false lines:false hidden:false}C:\Program Files\VMware\VMware OVF Tool\ovftool.exe “X:\NSVPX-ESX-9.3-52.3_nc\NSVPX-ESX-9.3-52.3_nc Folder\NSVPX-ESX-9.3-52.3_nc.ovf” “X:\NSVPX-ESX-9.3-52.3_nc\NSVPX-ESX-9.3-52.3_nc Folder\NSVPX.vmx”{/code}
The machine must have 2 vCPU’s and 2GB RAM in order to boot, so dont think about changing these as I did!
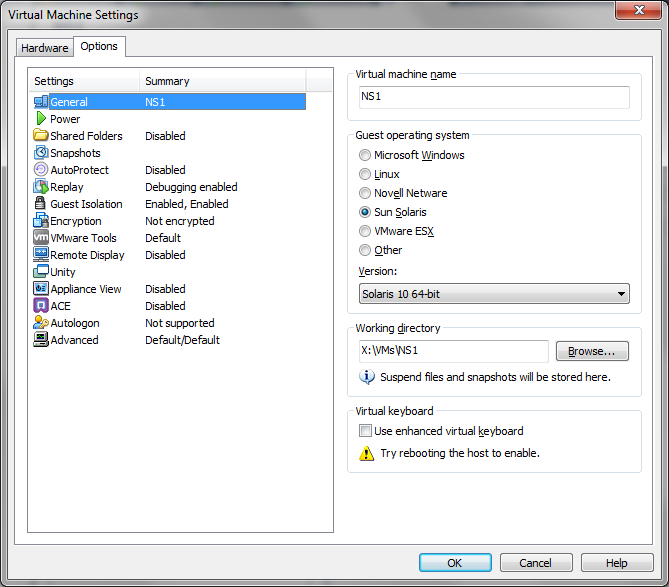
You’ll need to make one change in the VM settings; the Operating System – change this to Solaris 10 64-bit:

Power on the VM, you’ll then be prompted to configure IPv4 addressing:

When finished you’ll be able to use a browser to navigate to the NetScaler Web Interface, after login you may be prompted to install JRE 6 update 14.

The default username and password are nsroot / nsroot
Initial Setup Wizard
When you login for the first time you’ll be prompted with the setup wizard, click next to proceed:

Confirm TCP/IPv4 settings for the NetScaler and also define the Mapped IP (MIP) Address – this is the address that client connections will appear to come from on your load balanced servers that utilise the NetScaler;

Choose to skip any configuration on the next page if you are using NetScaler for Exchange 2010, your configuration may vary here:

Click finish on the summary screen to apply the configuration:

Close any other windows that popup following this wizard.
Obtain License From Citrix
Next things next you’ll need ot obtain a license from Citrix for the NetScaler;
- Go to MyCitrix and create a new account, or login using your existing MyCitrix credentials.
- After login, go to: My tools > Choose a Toolbox > Manage Licenses > Allocate.
- Select the Don’t see your product? Link located at the top right corner of the Allocate web key page.
- Enter the license code(s) displayed above in the Find your license dialog box and click Continue.
- When the Host Name warning page displays, select Continue. The hostname can be obtained using the following commands form the console:
{code lang:css showtitle:false lines:false hidden:false}shell{/code}
{code lang:css showtitle:false lines:false hidden:false}lmutil lmhostid –ether{/code}
(NOTE; remove the colon’s from the MAC address when inputting it into My Citrix!)
Installing the License
In order to utilise most of the NetScaler functions you need to import your license that you downloaded in the last step.
Browse to System > Licenses from the NetScaler Management Interface

At the bottom of the page there is a ‘Manage Licenses…’ link, click it, click Add and browse to the file you downloaded:

Finally, click ‘OK’ – you’ll be prompted to reboot, after-which your NetScaler is ready for configuration.
