In this article I’ll briefly cover the deployment of XenApp 6.5 alongside the Citrix Licensing Server configuration, this is very much geared towards an article that I’m working on at the moment for Citrix Access Gateway (NetScaler VPX based) configuration for Storefront 1.1 and also Local Balancing Storefornt via the NetScaler VPX appliance.
Contents
3. XenApp License Server Configuration
4. Configure XenApp License Settings
5. Create or Join a XenApp Farm
1. Obtain License File
It’s possible to get trial licenses for XenApp 6.5 – simply obtain a trial license key using Citrix XenApp Trial, then activate this key in the My Citrix console, much as per my NetScaler Deployment, albeit for XenApp as opposed to the NetScaler devices.
Just ensure you enter the license server hostname as per the way the name is displayed in Computer Properties on the server itself as the name is CaSe Sensitive.
2. Installation of XenApp 6.5
Now for the purposes of this article I’ll be creating a new, single server farm – something which you’re unlikely to deploy in produciton. That said this will give you a feel for the deployment of XenApp 6.5 and what to expect – I’ll point out the differences for adding additional nodes to this farm should you wish to do so.
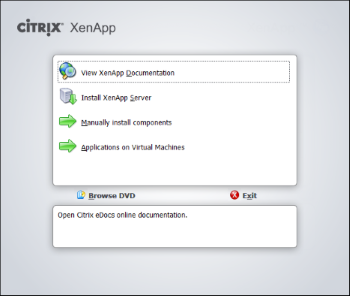
Start the Autorun form the ISO file/DVD to begin the installation, unsurprisingly you need ot select ‘Install XenApp Server’

Click OK to install .NET 3.5 as part of the setup;

When the Citrix XenApp Server Role Manager starts up select ‘Add Server Roles’ – you’ll be getting familiar with this role manager console:

Select the correct edition for your license, in this case Advanced Edition:

Accept the license agreement to proceed:

We’ll chose not to install the Web Interface or Storefront as the 1.0 release is ‘broken’ as of the 1st of April (you can’t open the Storefront MMC console as it will generate a .NET error!). We’ll manually deploy Storefront 1.1 afterwards:

Select to install the Single-Sign-On Plug-in. In this example I WON’T be shating the XML service with IIS – there are pro’s and cons to doing this.
-
- Pro – can leverage HTTPS XML communication due to IIS ISAPI plugin;
- Con – requires IIS on Citrix Server (for this lab not a issue, but in production this may be an issue for you)

Review the pre-requisite requirements and click Next

Click Install to begin the installation process:

Review the installation and click finish, then wait for the XenApp Role Manager window to load (may take a couple of minutes)

Click on ‘Reboot’ to initiate a reboot (surprise!), XenApp Role Manager will automatically load after the reboot:

Continue the installation by clicking ‘Install’

Once complete review progress and then click Finish.

XenApp Role Manager will load, click on ‘Configure‘ next to License Server (ignore the screenshot where it contains Storefront, this was before I relaised the 1.0 version was broken!):

3. XenApp License Server Configuration
In order to finalise the XenApp server configuration you need ot configure the License Server – now this may not apply as you may have a License server capable of licensing XenApp 6.5, if not then this step will apply!
In the previous step we click ‘Configure’ on the License Server role, this will load the Configuration Utility, set a password you won’t forget and click OK – that was easy!

Now we’ll install the XenApp license you downloaded from My Citrix earlier. Form the Start menu browse to All Programs > Citrix > Management Consoles > License Administration Console, this will load the web interface as follows:

Click on Administration at the top right, enter admin and then the password you set earlier, then click on ‘Vendor Daemon Configuration’ form the menu on the left:

Browse for your downloaded license file and click Import License:

Hopefully the import will work, click OK then close the web browser.

Now open services.msc and restart the Citrix Licensing service, this will allow the License Server to add the licenses:

Finally open the License Administration Console and check that your licenses are listed:

We’re now able to proceed with the XenApp configuration.
4. Configure XenApp License Settings
From XenApp Role Manager click ‘Specify Licensing’ next to XenApp, once completed this will allow us to configure licensing and then create/join a farm.
Confirm the license server FQDN and port number (27000 is default, so unless you changed it in the previous step of this article leave as-is)

Select the licensing model that’s right for your environment, in this case XenApp:

We’re now ready to create or join a XenApp farm!
5. Create or Join a XenApp Farm
From XenApp Role Manager select ‘Configure’ under the XenApp heading:

Choose to either create a new farm (you have no other XenApp servers of a suitable version) or join an existing farm, in this case select ‘Create a new server farm’:

Specify the new farm name and first XenApp Administrator account:

If you have a remote database you want to use choose this option (suggested for server farms – use a SQL cluster or database replication for resilience of this database!). For this lab I’ll get XenApp to install SQL Express locally:

Specify administartive credentials to deploy SQL:

Click Next to proceed:

Configure Shadowing permissions (will vary between organisations) – remember if you disable this now you cannot re-enable it!

Select Active Directory as the Central Store (unless you want to use an NTFS Share):

I this example I have configured the XML service to use port 8081, leave it as 8080 if you want to:

Finally(!) click apply, when the server is rebooted this configuration will then be applied. If you are joining an existing farm now is the time to clone your server! If you are creating a new farm with a local SQL database I wouldn’t suggest you clone this server, clone the subsequent server you join to the farm.

