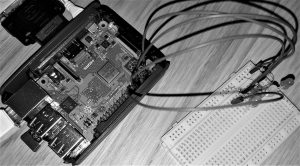
Its worth noting that Pi-Hole can be deployed on an x86 or ARMHF (Raspberry Pi) Linux platform (i.e. no Windows deployments). That said, any device/ client type can *use* the service once deployed/ configured as outlined below.
If like me, you have young kids you’ll want to try and protect them from inappropriate content online. This is no easy feat, and there is no ‘silver bullet.’
I was already using OpenDNS Family Shield to provide DNS-based filtering via my Internet router (functionality integrated into modern ASUS routers, but you can manually set your DNS servers as outlined here) but this wasn’t sufficient when reviewing search engine results, especially image search results.
I started looking at web content filters such as Privoxy, SquidGaurd, E2Guardian etc. but when it came to HTTPS/ SSL filtering these all suffer from very limited capabilities or were complex to setup/ configure (requirement for custom CA certificates on devices for starters). As more and more of the Internet goes SSL-only this meant that using one of these options was, potentially, a “depreciating” solution.
I needed to find an effective way to filter content presented by search engines whilst maintaining the excellent block-list functionality that OpenDNS Family Shield provides. Further reading led me to discover that popular search engines/ YouTub provide Safe Search/ Restricted Search-only URLs that have to be set/ configured using DNS CNAMEs – some links that will explain this in more detail (you can skip these if you are looking to configure this capability within PiHole):
Sadly, despite being requested multiple times, OpenDNS Family shield does not provide this functionality – interestingly this seems like a fairly simple capability to offer considering that DNS itself is the mechanism to force Safe Search. Enter Pi-Hole and dnsmasq.
PiHole is not a web content filter, it is an Ad blocker.
However, you can use the built-in dnsmasq service to force Safe Search URLs against popular search engines/ YouTube and continue to leverage DNS-based filtering such as OpenDNS Family shield. The two combined seem to provide a comfortable level of protection for my home network.
This guide assumes you have Docker installed/ running on Linux, this guide was tested on Ubuntu 17.10.
Docker Containers are immutable – i.e. if you delete the container its contents (including your configuration/ customisation) will be lost. We can use Docker volumes/ mount functionality to persist some data.
sudo mkdir /var/kvm/images/docker/pihole
sudo mkdir /var/kvm/images/docker/pihole/dnsmasq.d
Now create required dnsmasq configuration to force Safe Search (note most guides I found on this neglect to mention requirement to add regional Google URL, in the UK when browsing to www.google.com you redirect to www.google.co.uk):
sudo vi /var/kvm/images/docker/pihole/dnsmasq.d/05-restrict.conf

# YouTube Restricted
cname=www.youtube.com,restrict.youtube.com
cname=m.youtube.com,restrict.youtube.com
cname=youtubei.googleapis.com,restrict.youtube.com
cname=youtube.googleapis.com,restrict.youtube.com
cname=www.youtube-nocookie.com,restrict.youtube.com

# Google SafeSearch
cname=www.google.com,forcesafesearch.google.com
cname=www.google.co.uk,forcesafesearch.google.com

# Bing Family Filter
cname=www.bing.com,strict.bing.com

# DuckDuckGo
cname=www.duckduckgo.com,safe.duckduckgo.com
cname=duckduckgo.com,safe.duckduckgo.com
Now create the Docker Container, be sure to change your upstream DNS servers set using the DNS1/ DNS2 arguments and change WEBPASSWORD value. Also, note the host-file entries that are passed through to the Docker Container using the “–add-host” Docker run argument.
You can also set DNS1/ DNS2 to be the OpenDNS servers, as outlined here.
Finally, on Ubuntu I had to specify the LAN IP address of the Docker host for tcp/ udp port 53 port exposure. This is because Docker has a built-in DNS resolver. Be sure to change the script/ replace 192.168.0.7 with your Docker host IP address.
IP_LOOKUP="$(ip route get 8.8.8.8 | awk '{ print $NF; exit }')" # May not work for VPN / tun0
IPv6_LOOKUP="$(ip -6 route get 2001:4860:4860::8888 | awk '{ print $10; exit }')" # May not work for VPN / tun0
IP="${IP:-$IP_LOOKUP}" # use $IP, if set, otherwise IP_LOOKUP
IPv6="${IPv6:-$IPv6_LOOKUP}" # use $IPv6, if set, otherwise IP_LOOKUP

sudo docker run -d \
--name pihole \
-p 192.168.0.7:53:53/tcp -p 192.168.0.7:53:53/udp -p 8081:80 \
-v /var/kvm/images/docker/pihole/:/etc/pihole/ \
-v /var/kvm/images/docker/pihole/dnsmasq.d/:/etc/dnsmasq.d/ \
-e ServerIP="${IP}" \
-e ServerIPv6="${IPv6}" \
-e WEBPASSWORD={your password} \
-e DNS1=192.168.0.254 \
-e DNS2=192.168.0.254 \
--add-host=restrict.youtube.com:216.239.38.120 \
--add-host=restrictmoderate.youtube.com:216.239.38.119 \
--add-host=forcesafesearch.google.com:216.239.38.120 \
--add-host=strict.bing.com:204.79.197.220 \
--add-host=safe.duckduckgo.com:34.243.144.154 \
--restart=unless-stopped \
diginc/pi-hole:latest
You can now browse to http://<Docker Host IP>:8081, this should bring up the Pi-Hole Web Interface.
Finally, you’ll need to modify the DHCP configuration for your network to ensure that clients are provided with the IP address of the Docker host running Pi-Hole as their DNS server. I’ll state that you don’t *need* to use Pi-Hole to force Safe Search, any local DNS service that you can configure CNAME/ A-Records to override default IPs returned for Search Engines outlined in this post will do. You can then set the upstream DNS server(s) to be Open DNS Family Shield, or anything else. Pi-Hole provides the added benefit of Ad blocking, and my kids love clicking on Ads…
